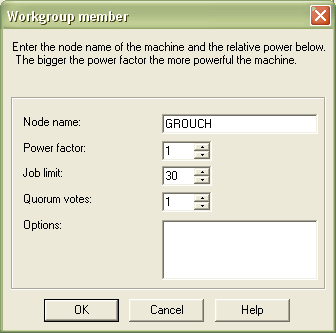
The next step in creating a workgroup is deciding which nodes you want the Workgroup jobs to run on and replicate on. The nodes should fully accessible to each other and available to process Workgroup directives at all times. These should also be nodes capable of performing the workload that the jobs entail. In the tutorial we will add two nodes to the Workgroup.
![]()
![]() In order to add the nodes to the Workgroup:
In order to add the nodes to the Workgroup:

The Power factor, Job limit, Quorum votes and Options fields can be left blank for this exercise. Since this will be a Workgroup where jobs run on all nodes, these settings don't apply. You should now have two members in your Workgroup.
Note: The names shown are used for example. Use the names or IP addresses of nodes running an EnterpriseSCHEDULE server in your own network.