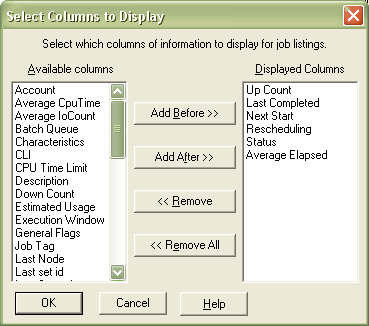
Selecting columns to display in the Job Explorer
The right pane of the Job Explorer window can be customized to display any of the properties of the selected job(s) in columns. This can provide a quick display of relevant information about a job without having to look at the Job Properties Page. In order to set the columns to be displayed in the Job Explorer:
- Right click in the right pane of the Job Explorer and select Select columns to display.
- Select the properties that are to be displayed in the columns.
- Click on Add Before to add the selections to the top of the list or Add After to add them to the bottom of the list.
- To remove a selection from the columns, select the item from the right list and click on Remove.
- To remove all items from the columns, select Remove All.
- Click on OK to approve the change.