| Previous | Contents | Index |
To display the file attributes in order to determine if a file needs to be restored, select Attributes from the Function menu. The form shown below will appear.
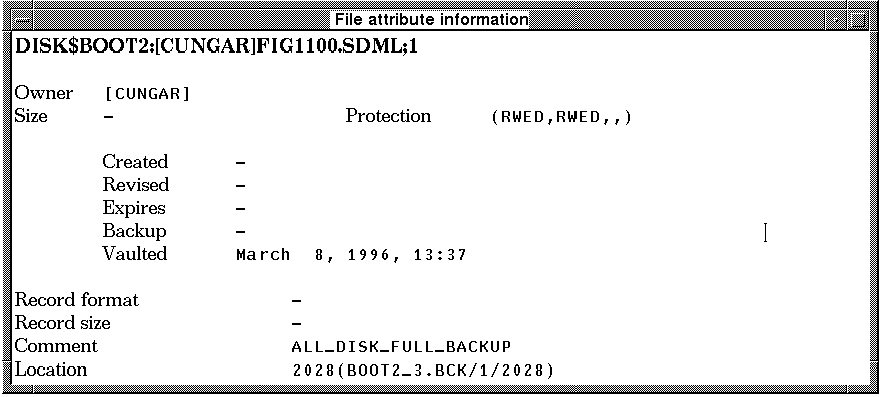
The fields displayed in the form are as follows:
| Field | Description |
|---|---|
| Owner | The user name of the owner of the file |
| Size | Size of the file in blocks |
| Protection | Protection level of the file |
| Created | Date the file was created |
| Revised | Date the file was last revived |
| Expires | The expiration date of the file |
| Backup | Back up date of the file |
| Vaulted | Date the file was entered in the VAULT database |
| Record format | Format of the file record |
| Record size | Size of the file record |
| Comment | Comment associated with the file volume record |
| Location | Off-line tape or disk on which the file resides |
In order to restore the selected file after determining it is the correct file and is on an available off-line medium, select Restore from the Function menu. The restore message will appear.

9.3.2 Select directory
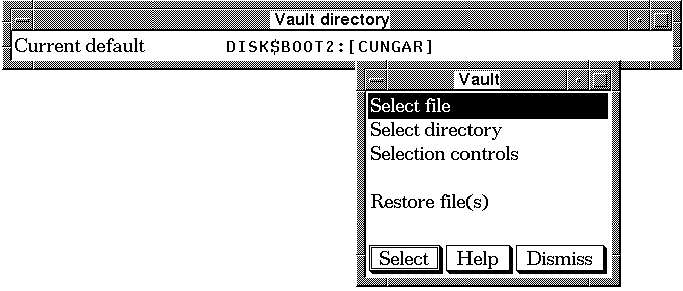
In order to select the directory to restore files from, select
Select directory from the Function
menu. Select the desired directory by using the arrow keys to navigate
the directories and pressing [Return] (or double click with
the cursor for DECWindows users).
9.3.3 Selection Controls
The selection controls enable the user to limit the scope of both the
directory and file lists that are displayed in the VAULT
program. To set the selection criteria for VAULT select
Selection controls from the Vault
menu. The form shown below will appear.
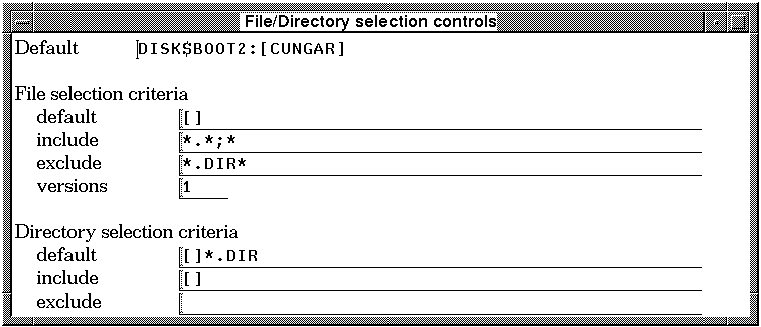
The fields displayed in the form are as follows:
| Field | Description |
|---|---|
| File selection criteria | |
| default | The default file selection location for the VAULT program. |
| include | The include criteria for the files to be displayed. Wildcards are acceptable. |
| exclude | The exclude criteria for the files to be displayed. Wildcards are acceptable. |
| versions | The number of versions to display in the file display window. |
| Directory selection criteria | |
| default | The default directory selection location for the VAULT program. |
| include | The include directory criteria for the VAULT program. |
| exclude | The exclude directory criteria for the VAULT program. |
The file to be restored may be entered manually rather than selected from the a list. In order to restore a particular file from a VAULT saveset, select Restore file from the Function menu. A dialog box will appear as shown.

Press [Do] or [Return] to restore the file.
9.4 Restore file(s) via search
The Restore via search facility allows the OPERATOR to create a detailed search criteria to locate needed files. By selecting such specific criteria as files names, saveset names and backup job, it is possible to locate files on any volume.
The file criteria should be as concise as possible. For example you don't want to search for all files vaulted in a top directory over the past year. Even with weekly backups over an entire year that list can be huge.
The form below shows the pre-search form. The fields in the form are as follows:

| Field | Description |
|---|---|
| Job names | Select a backup job name from which to perform the search. |
| Saveset names | Select a particular saveset that is used to back up the desired files. |
| Restore from | Selects file name and location to restore from. |
| Restore to | Selects file name and location to restore to. |
| Backed up after | Selects only files backed up after this date. |
| Backed up before | Selectes only files backed up before this date. |
Fill in the form with the criteria for the file search you are interested. The volume list will be displayed as shown below. You may select each of the volumes and decide which saveset to use for the restore.
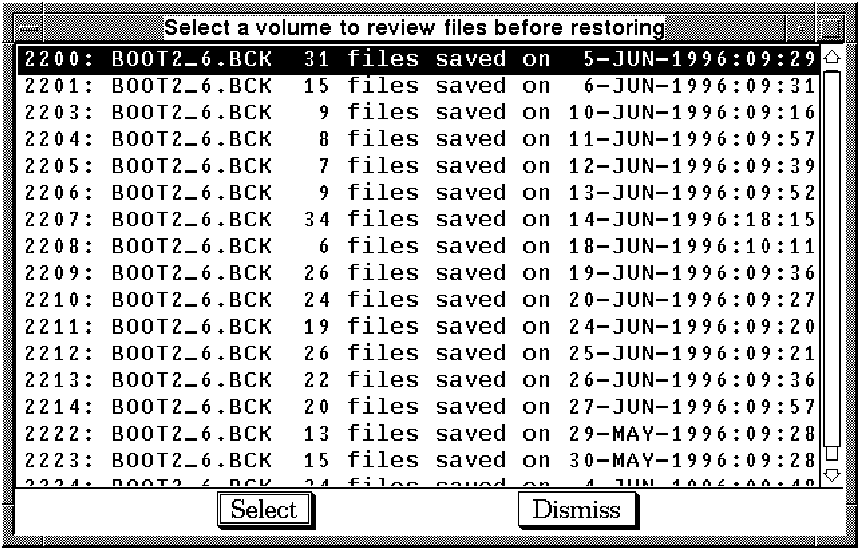
Upon selecting a volume, the files backed up onto that volume will be displayed as shown below. If these are the files you desire to be restored, choose Select.
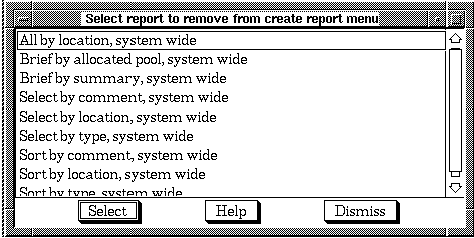
The restore job will begin if Yes is chosen from the following form.

This chapter consists of information on the remaining options available
from the MEDIA Librarian Menu which were not covered in the
chapters on MEDIA and BCKMGR.
10.1 Viewing the configuration (for users and operators)
The option of configuring the program is available only to managers. Therefore, general users and OPERATORS will see the words `View configuration' on the Media Librarian menu, rather than `Configure the software'. |
If you are a general user or an operator you may view but not modify the parameter settings. In order to view the parameter settings either on the screen or in a file choose View parameter settings from the Media Librarian menu. A menu will appear on the screen prompting for the option of on screen or file output.
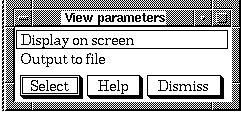
If Display on screen is chosen, the Configuration Parameter Summary will appear.
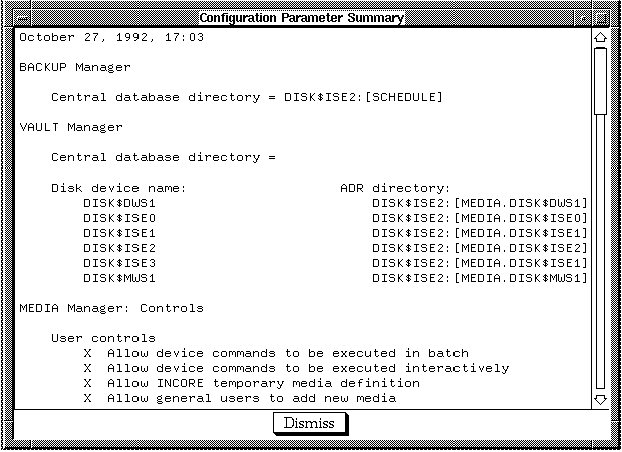
If Output to file is chosen, a dialog box will appear
prompting the user to enter the name of the file to output to.
10.2 Start new DCL session
In order to exit MCL temporarily and start a new DCL session,
select Start new DCL session from the MEDIA
Librarian menu. The menus will no longer appear and you will
be placed at the DCL prompt from which you may perform any desired
procedure. In order to exit the DCL session, simply log out of the
session and you will be placed back into MCL.
10.3 Obtain HELP
In order to obtain HELP in MCL, select Obtain
HELP from the MEDIA Librarian menu. The HELP
display differs slightly for VT and DECwindows terminals.
10.3.1 DECwindows HELP display
Figure 10-1 displays the DECwindows HELP window. The upper portion of the window displays the HELP text and the window offers additional options for HELP.
Figure 10-1 DECwindows HELP display
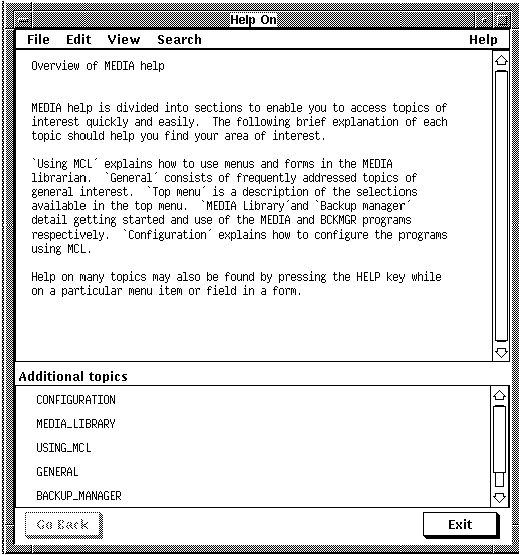
Each successive option may offer related options for selection. Select
an option in the same way as a menu option is selected, using arrow
keys or the cursor for mouse users.
10.3.2 VT HELP display
Figure Figure 10-2 displays the VT HELP screen. The upper part of the window displays the HELP data and the selections below offer the choices for HELP.
Figure 10-2 VT HELP display
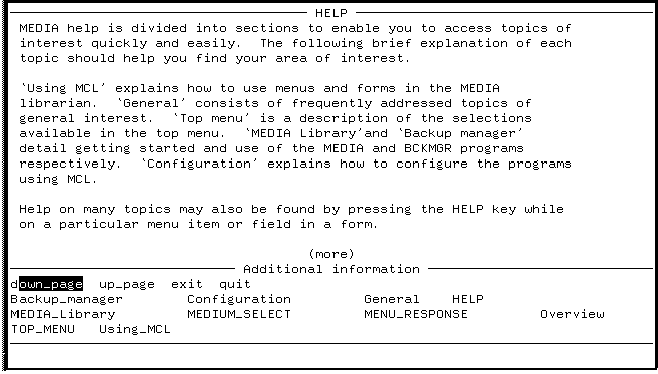
In addition to help on topics of interest and breakdowns of menu items,
there are help topics available on the VT menus that are related to the
interactive HELP used within MCL. These options are more
useful when thay are selected interactively from within the program,
but they may be viewed from the help screen if desired.
10.4 Interrupt menu
To bring up a menu of interrupt operations, simultaneously press the [CONTROL] key and either the [C] or [Y] key, or press the [Cancel] ([F6]) key. The interrupt menu shown in Figure 10-3 appears on the screen.
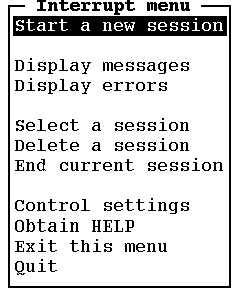
Upon the completion of operations of any menu item from this menu, this menu is automatically exited and the last MCL session is again SELECTed.
It should be noted that HELP can be accessed at anytime during an MCL
session simply by pressing the HELP key.
10.4.1 Start a new session
To start a new MCl session, select Start a new session from the Interrupt Menu. The Media Librarian Menu appears on the screen.
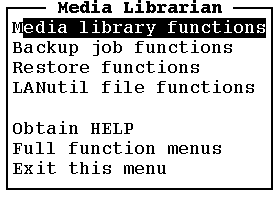
This process can be repeated to bring up as many sessions as desired.
10.4.2 Display messages
To display any broadcast messages that have been received since the last time this display was done, select Display messages from the Interrupt Menu.

To display messages about any errors that have occurred since the last time this display was done, select Display errors from the Interrupt Menu.

To resume execution of another session, select Select a session from the Interrupt Menu.
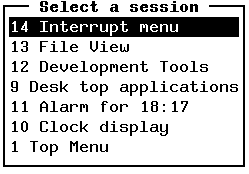
When a user selects a session from the menu, that session becomes the
active session.
10.4.5 Delete a session
To delete a session and free all resources for that session, select Delete a session from the Interrupt Menu.
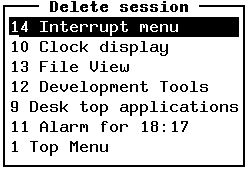
When a user selects a session from the menu, that session is deleted
and all of the windows displayed for the session are cleared from the
screen.
10.4.6 End current session
To terminate the session that was just interrupted, select End
current session from the Interrupt Menu. The
current session is deleted and all of the windows displayed for the
session are cleared from the screen. If there are no other sessions at
this time, you will exit MCL and return to the DCL prompt.
10.4.7 Control settings
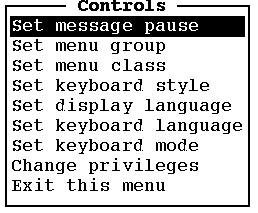
To change some of the general system controls, select Control settings from the Interrupt Menu. On a VT terminal, Figure 10-4, VT Controls Menu appears on the screen.
Figure 10-4 VT Controls Menu
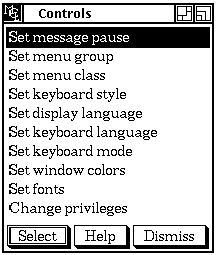
On a DECwindows workstation, Figure 10-5 DECwindows Controls Menu appears on the screen.
Figure 10-5 DECwindows Controls Menu
To specify the amount of time that error messages and short notices are held on the screen, select Set message pause from the Controls menu.
Figure 10-6 Message Pause Form

When the user enters the pause time and presses return, the menu
display is cleared from the session.
10.4.7.2 Set menu group
To specify the menu groups to be accessed during MCL operation, select Set menu group from the Controls menu. Figure 10-7 Menu Group Form appears on the screen with the existing menu groups provided as the initial entry.
Figure 10-7 Menu Group Menu

All menu selections are grouped. Each group can be turned on or off via a letter code. To turn OFF a menu selection, delete that letter from the existing menu groups. When a new session is started, all changes are invoked.
The MEDIA menu group is represented by the letter
M. The BCKMGR menu group is represented by
the letter B.
10.4.7.3 Set menu class
To specify the menu classes to be accessed during MCL operation, select Set menu class from the Controls menu. The menu appears on the screen with the existing menu classes provided as the initial entry.

All menu selections are classified. Each class can be turned on or off via a letter code.
The two classes in present use are represented by the letter
V for VT menus and the letter X for
DECwindows menus. Most menu selections are set up for both classes.
However, the last selection in most VT menus, which is Exit
this menu, does not appear in the DECwindows menus. This is
the result of this menu selection being set up only for the
V class.
10.4.7.4 Set keyboard style
To set the behavior of several of the keyboard special function keys to be DCL or DECforms, select Set keyboard style from the Controls menu. The Keyboard Style Menu appears on the screen.

The DCL selection will set the keys TAB (move to right 8 columns), BS (move to beginning of line), LF (erase to beginning of line), and <CR> (field done) to work the same way as in VMS/DCL.
The DECforms selection will set the keys TAB (move to next field), BS (move to previous field), LF (erase field), and <CR> (form done) to work the same way as in DECforms.
When a user selects one of the two styles, the menu is automatically exited.
| Previous | Next | Contents | Index |