| Previous | Contents | Index |
To set the print parameters for the reports, select Set print parameters from the Control Settings menu. The figure shown below will appear.

All of the data set in this form only relates to generating a batch job to print out a report. This data does not affect the MEDIA database.
For the description of the data to be entered into this form, see the following table.
In order to add reports to the Create a BCKMGR Controls report
menu, choose Add reports from the Control settings
menu. A menu listing of the reports not already added to the menu will
appear. Choose the desired report and it will appear the next time the
program is invoked.
8.8.2.6 Remove reports from menu
In order to remove reports from the Create a BCKMGR Controls report
menu, choose Remove reports menu. A menu listing of
the reports already added to the menu will appear. Choose the desired
report and it will not appear the next time the program is invoked.
8.9 Generate history reports
To produce history reports, select Generate history reports from the BACKUP Manager menu. Create a BCKMGR History Report Menu appears on the screen.
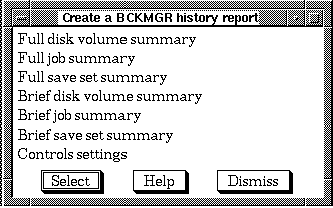
Selecting any menu item from the first menu item to the Control
settings menu item will produce a report. Reports can be added
or removed from this menu by user selections within the Control
settings menu item.
8.9.1 Control settings
To control the selection of data to be reported and parameters related
to producing the report, select Control settings from
the Create a BCKMGR menu.
8.9.1.1 Set selections
To control the selection of data to be reported, select Set selections from the Control Settings menu. The form shown below will appear.
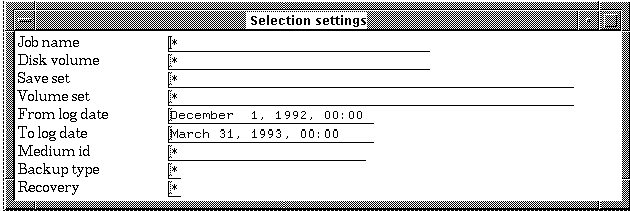
The data entered into each field in this form can be used as a
selection filter to control which media are displayed in the reports.
Each report can be set up to use any, all or none of these selection
filters.
8.9.1.2 Set execution mode
To control the output of the report, select Set execution
mode from the Control Settings menu. Refer to
Section 8.8.2.2 for information on setting the submit parameters.
8.9.1.3 Set submit parameters
To set the submit parameters for the reports, select Set submit
parameters from the Control Settings menu.
Refer to section Section 8.8.2.3 for information on setting the execution
mode.
8.9.1.4 Set print parameters
To set the print parameters for the reports, select Set print
parameters from the Control Settings menu.
See Section 8.8.2.4 for more information on setting print parameters.
8.9.1.5 Add reports to menu
In order to add reports to the Create a BCKMGR History report menu,
choose Add reports from the Control settings menu. A
menu listing of the reports not already added to the menu will appear.
Choose the desired report and it will appear the next time the program
is invoked.
8.9.1.6 Remove reports from menu
In order to remove reports from the Create a BCKMGR History report menu, choose Remove reports menu. A menu listing of the reports already added to the menu will appear.
Choose the desired report and it will not appear the next time the
program is invoked.
8.10 MCL Report types
BCKMGR features a variety of report types which provide
information on many aspects of the BCKMGR database. The
reports are divided into two distinct categories: control and history
reports.
8.10.1 Control reports
BCKMGR control reports provide information about BCKMGR database controls. The reports available in MCL are listed below.
| Report type | Sorted by | Report type | Sorted by |
|---|---|---|---|
| Full backup params, | by comment | Brief backup, | by comment |
| by job | by job | ||
| by media type | by media type | ||
| by user | by user | ||
| Full submit controls, | by comment | Brief submit controls, | by comment |
| by job | by job | ||
| by media type | by media type | ||
| by user | by user | ||
| Full summary, | by comment | Brief summary, | by comment |
| by job | by job | ||
| by media type | by media type | ||
| by user | by user |
BCKMGR history reports provide information about BCKMGR history. The reports available in MCL are listed below.
| Full disk volume summary | Brief disk volume summary |
| Full job summary | Brief job summary |
| Full saveset summary | Brief saveset summary |
This chapter familiarizes the user with the three types of restore that can be performed in the MCL Work Center. Using VAULT the user can restore off-line files by simply selecting the desired file and then choosing the restore command from the menu.
VAULT, Restore via search and Restore entire disk makes the restoring of lost or deleted files easier by allowing restoration from remote nodes and even remote PC's. The process is further simplified by the ease of use of the MOTIF Work Center .
Figure 9-1 Restore functions

The Restore entire disk program can be used to restore a disk because of errors, disk crash, relocation or any other reason. The latest full disk backup and latest incremental backups are combined to restore the disk to it's most recent state.
VAULT maintains a directory structured database that lists information about files that have been backed up. The main objective is to facilitate identifying what has been backed up and simplify the selective file restore process.
The VAULT interface is made up of the File selection fields, the file list and controls for customizing and displaying the the file list.
The VAULT database contains an entry for every file. This entry gives the file storage location, when backed up and other attributes. Each backup can be individually set to add or not to add information to the database.
The Restore via search facility allows the OPERATOR to create a
detailed search criteria to locate needed files. By selecting such
specific criteria as files names, saveset names and backup job, it is
possible to locate files on any volume.
9.1 Restore an entire disk using MCL
A special feature of MEDIA is the ability to perform a complete disk recovery. Though several events may create the need for such a drastic procedure, the most common is a disk crash which results in a complete loss of data. Keep in mind that a full disk recovery is meant purely as an emergency procedure and will restore data only as current as your most recent incremental backup.
In order to restore an entire disk, choose Restore entire
disk from the Media Librarian menu.
9.1.1 Select drive and print controls
In order to designate the drive (volume) to be recovered, the date to restore up to and the printer controls for the restore report, choose Select drive and print controls from the Full disk recovery menu. The form shown below will appear.
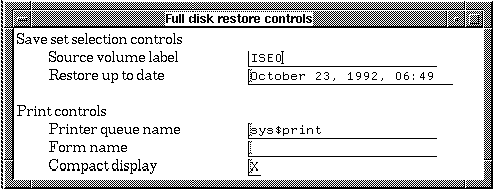
For a description of all fields displayed in the form, see table below.
| Data | Description |
|---|---|
| Source volume label | The volume label of the source drive to be recovered. |
| Restore up to date | The date up to which the restoration will take place. Any files backed up after this date will not be restored. |
| Printer queue name | Name of the printer queue to send the report of the restore. |
| Form name | Uses a form name from the system's library to print the report of the restore. |
| Compact display | Designates whether the report will print in compact or regular mode. |
In order to display volume requirements, choose Display volume requirements from the Full disk recovery menu. A flashing box should appear with the message "Working" displayed. After this box, a listing of all backups that will be used for the full restoration will appear, as shown below.
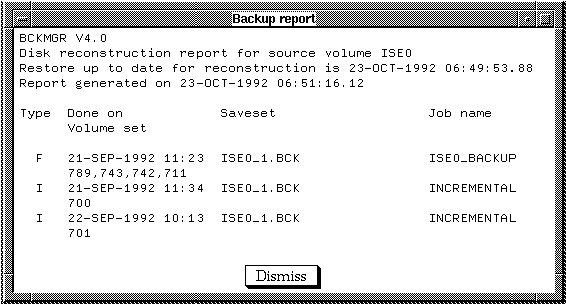
In order to print volume requirements, choose Print volume
requirements from the Full disk recovery
menu. This option will print the information that was described in the
previous section on displaying the volume requirements. The queue and
form name controls can be set in the "Select drive and print controls"
form.
9.1.4 Create restore job
In order to create a restore job, choose Create restore job from the Full disk recovery menu. The form shown below will appear.

The form features two fields, Target device and Submit immediately. The
target device is the desired device to be used for the restoration. In
other words, this is where the backups will be restored to. The other
field, Submit immediately is a positive or negative response field that
determines whether the restore will take place immediately or later.
The information is stored in a file and may be submitted at any time
after it is created.
9.2 VAULT Restore
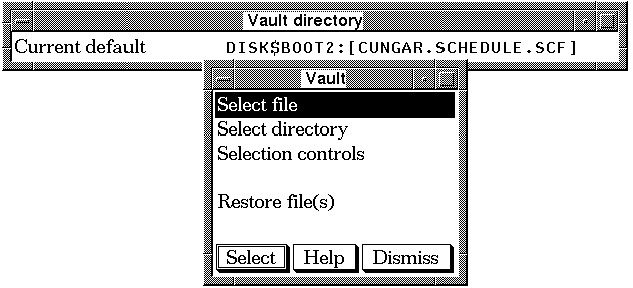
The VAULT interface displays the current VAULT directory in a status window. See Figure 9-2.
Figure 9-2 VAULT directory window

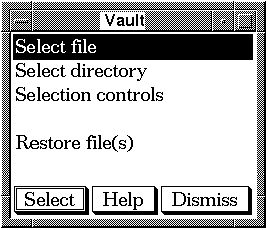
This lets the user know what directory he is working in at all times. The VAULT display also brings up a menu of the VAULT functions that can be performed in MCL. See Figure 9-3.
Figure 9-3 VAULT menu
The usual steps for restoring files using MCL are as follows.
In order to use VAULT in MCL, select Vaulted functions from the Media Librarian menu. The VAULT directory window and VAULT menu will appear. See Figure 9-4.
Figure 9-4 VAULT display
The VAULT functions are described in the following sections.
9.3.1 Select file
In order to select files in the presently selected directory for restoration, select Restore file from the VAULT menu. A listing of files will appear. See Figure 9-5.
Figure 9-5 Vaulted file list
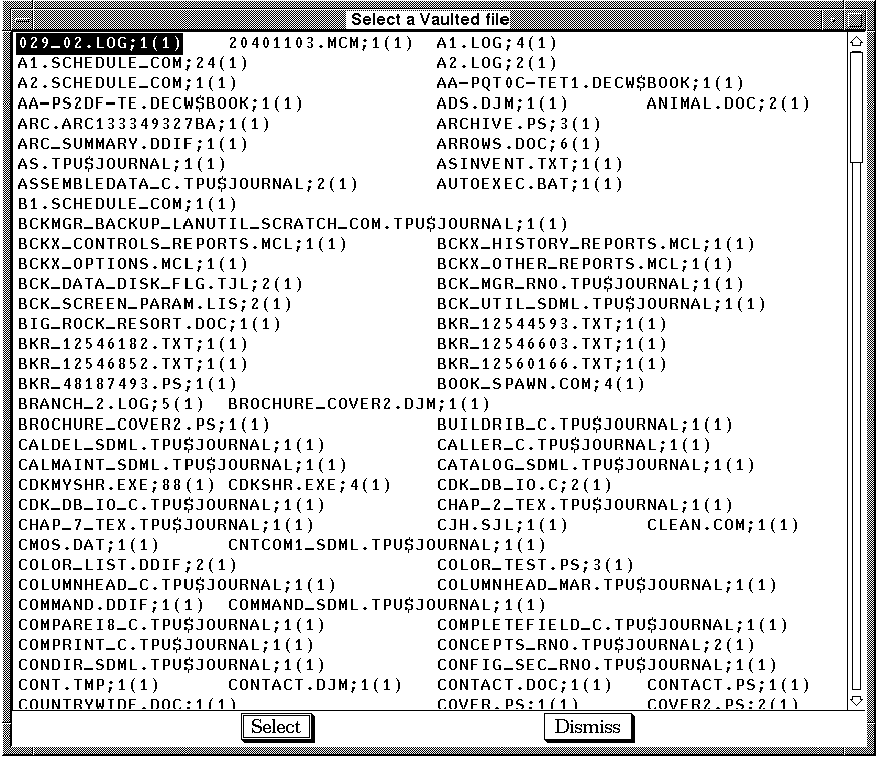
Select a file to display a selection menu from which you may either display the file attributes or restore the file.
| Previous | Next | Contents | Index |