| Previous | Contents | Index |
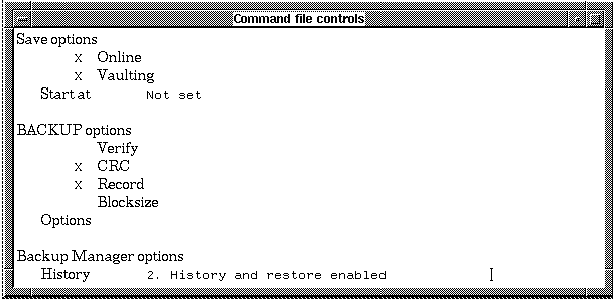
The BACKUP job settings are used to configure the type of backup job. In order to display the BACKUP job settings, select BACKUP job settings from the Section menu.
The form shown below will be displayed for non-RDB backup jobs.
The form shown below will be displayed for RDB backup jobs.

For a description of all fields displayed in the forms, see
Table 8-2.
8.4.2.3 DCL commands
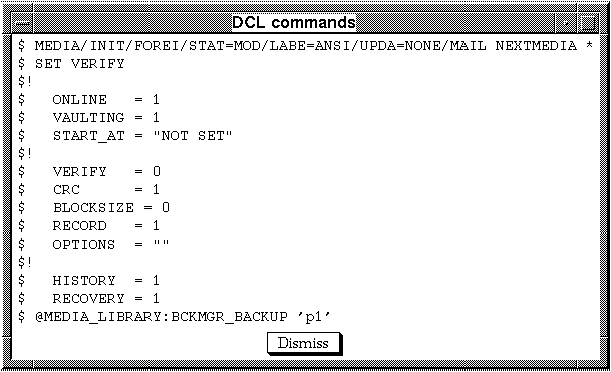
In order to display the command file of DCL commands for the selected BCKMGR job, select DCL commands from the Section menu. A window will appear, as shown below.
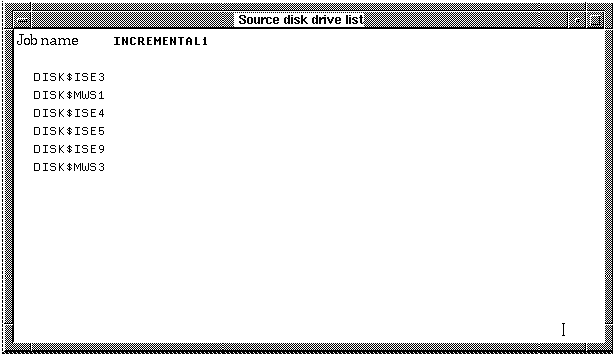
Depending on the job type, this menu item will also vary. If the job is a backup job, this menu item will read "Source disk list". In this case, up to 29 source disks to be backed up will be listed in the slots provided. In order to display the source disks, select Source disk list from the Section menu. A list similar to that shown below will appear.
In the case of an RDB backup job, this menu item will read Database list. The database list includes a list of the RDB database files that are to be backed up with the job. This includes the complete path to the data base files. By area operations (portions of databases) can be designated using the following statements adjacent to the database file in the list:
In order to display a database list for your job, choose Database list from the Section menu. The list shown below will appear.

In the case of a mode 1 (Other), mode 9-255 or a non-backup job the menu item will read "Parameter list". The parameter list may consist of any applicable parameters relevant to the job. These parameters should be defined by the user and relate to the commands in the defined job.
In order to display a parameter list for your job, choose Parameter list from the Section menu. The form shown below will appear.

Up to 29 different parameters may be displayed in this form. Parameter
30 is reserved for systems that do not have SCHEDULE 4.0
installed and is used for the rescheduling interval of the job.
8.4.2.5 Access controls
In order to display the level of access to the chosen job, choose Access controls from the Section menu. The access controls for the jobs are set using standard VMS protection. The form for this operation is shown below.

For a description of all fields displayed in the form, see
Table 8-4.
8.4.3 Delete
In order to delete a backup job, select Delete from
the Function menu. A confirmation message will be
displayed requesting the user to decide whether or not he really wants
to delete the job. Pressing RETURN or DO will permanently delete the
job. [REMOVE], [F10] or [CTRL] Z will
ignore the delete request.
8.4.4 Submit immediately
When a job is submitted, all definitions, parameters and DCL commands
are collected and the job is readied for execution. It will then be run
according to the interval designated in the "Start auto submit cycle"
form. In order to submit a job, choose Submit
immediately from the Function menu.
8.4.5 Display media (Backup jobs only)
Menu items designated as (Backup jobs only) apply only if the job is a backup. If it is not, you will not have access to these options nor will they be visible. |
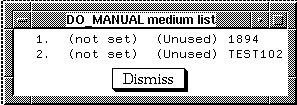
The process of assigning a medium to a backup job transfers control of the medium to the BCKMGR system. The media will then be used for the backup job. In the case of a "Cycle" or "One pass" backup job, all media must be assigned directly in order to avoid failure of the job. The number of media assigned to the job must equal the number required.
In the case of a "Generation" backup job, it is not neccesary to assign all media required, though all or some may be assigned if desired. The remainder will be automatically obtained from the available pool. Assigning media limits access to the media by the MEDIA database, enabling only the MEDIA DCL commands DIRECTORY and SET to be allowed.
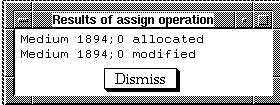
In order to assign media from the available pool to a job, choose Assign from available pool from the Function menu. This procedure should be used when the medium to be used by the backup job as a target medium does not need to be a specific medium. The next available medium will be assigned. A message similar to the one shown below will appear.
Repeat this step for each medium needed for the job.
8.4.7 Assign specified medium (Backup jobs only)
The other case of assigning media is when the medium does need to be specified. This is a useful way of designating media for the specific purpose of backups and assuring they will be used for that purpose. In order to assign specified media to the backup job, select Assign specified media from the Function menu. A dialog box will appear, requesting the external ID of the medium.

Upon entering the external ID, the medium will be assigned to the job.
8.4.8 Deassign media (Backup jobs only)
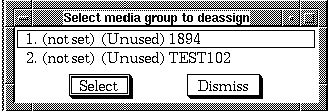
The process of deassigning a medium from a backup job transfers control of the medium from the BCKMGR system back to MEDIA. The deassigned medium will no longer be used in the backup job. In order to deassign a medium from a job, choose Deassign from the Function menu. A menu listing all assigned media will appear from which the medium to be deassigned may be chosen.
8.4.9 Trim unused media (Backup jobs/Full function menus only)
The process of trimming media involves forcing a job that has allocated
a lot of media from the available pool, but not used them all, to
return the excess back to the pool. If you find your job has too manyt
media, this method should be used to clean up the job.
In order to trim the unused media from the job, choose Trim unused media from the Function menu. A list of the job's unused media will appear,

followed by a request to confirm the trim operation. If an affirmative
response is given to this prompt, the unused media will be deassigned.
8.4.10 Start auto submit cycle (systems with SCHEDULE 4.0)
If SCHEDULE 4.0 is installed on your system, the fields that will appear in this form will differ from systems without SCHEDULE.
In order to start the auto submit cycle, choose Select auto submit cycle from the Function menu.

You should then fill in the job name, start time and interval of the
SCHEDULE job you would like the backup job to be run from.
8.4.11 Start auto submit cycle (systems without SCHEDULE)
If SCHEDULE is not installed on your system, the fields that will appear in this form will differ from systems with SCHEDULE.
Without SCHEDULE, you will not be able to attach a job to a
SCHEDULE job. In order to start the auto submit cycle, choose
Select auto submit cycle from the
Function menu. You should then fill in the start time
and interval of the job.
8.5 Selection controls
In order to include or exclude certain jobs in the selection menu, choose Selection controls from the Function menu. The form shown below will appear.

Type in either the name of a specific job or a valid VMS wildcard
specification to either the include or exclude field in order to limit
the jobs displayed.
8.6 Create a new job
In order to create a new job and designate the General information on the job, choose Create a new job from the Function menu. The form shown below will appear.
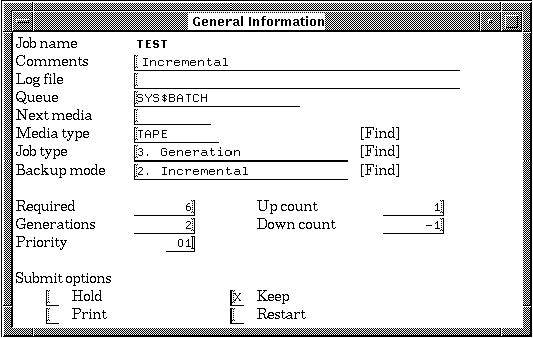
Each field in the form is described in Table 8-3.
8.7 Edit controls
Selection of this menu item allows the user to select a preferred text editor for use in file editing during work in the BCKMGR software.
In order to choose the type of editor and the location of the editor startup file, choose Edit controls from the BACKUP manager menu.

The editors which may be chosen are EDT and TPU for VT terminal users
and EDX and TPU for DECwindows users. In addition, the location and
name of the editor startup file may be designated at this time.
8.8 Generate control reports
There are two basic types of BCKMGR reports: reports about BCKMGR database controls (BCKMGR) and reports about BCKMGR history (BCKMGRH). The method for producing reports for each of these basic types of data is virtually identical. In each case, the first menu to appear has the list of currently eligible reports as menu items, followed by a Control settings menu item. The controls for both data and contents reports are identical, except for the data filters, which are specific to that type of data.
It should be noted that HELP can be accessed at any time during an MCL session by pressing the HELP key.
To produce reports about the database, select Generate control reports from the BACKUP Manager menu. The menu shown below appears on the screen.
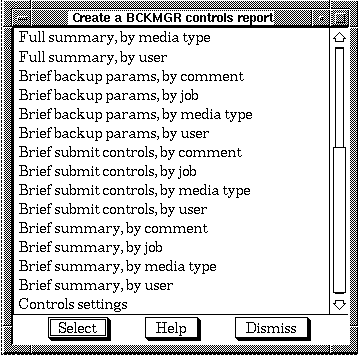
Selecting any menu item from the first menu item to the Control
settings menu item will produce a report. Reports can be added
or removed from this menu by user selections within the Control
settings menu item.
8.8.1 Sample report
To produce a report about the BCKMGR database, select the desired report from the Create a BCKMGR Report menu. If the Execute mode is set to output to the screen, then a sample report display appears on the screen. Two sample reports are described and listed below. Figure 8-7 displays a report of brief submit controls, by job.
Figure 8-7 Sample Report Display: Brief submit controls, by job

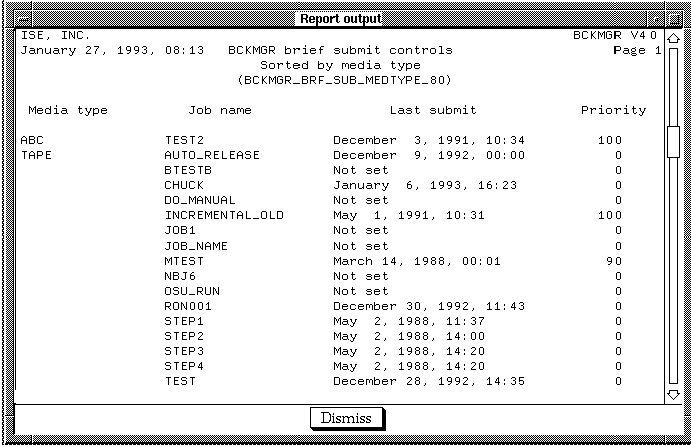
Figure 8-8 displays a report of brief submit controls, by media type.
Figure 8-8 Sample Report Display: Brief submit controls, by media type
8.8.2 Control settings
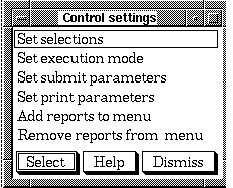
To control the selection of data to be reported and parameters related
to producing the report, select Control settings from
the Create a BCKMGR menu.
8.8.2.1 Set selections
To control the selection of data to be reported, select Set
selections from the Control Settings menu.

The data entered into each field in this form can be used as a
selection filter to control which media are displayed in the reports.
Each report can be set up to use any, all or none of these selection
filters.
8.8.2.2 Set execution mode
To control the output of the report, select Set execution mode from the Control Settings menu.

To choose between 80 column and 132 column reports, either set or clear the 80 (vs 132) columns flag. The 132 column reports contain more columns of data and, in some cases, more characters for specific data fields than the 80 column reports. To modify the execute mode, move the cursor to the Execute mode field and press FIND.

You may choose to submit to batch or to execute immediately. The report can be output to a specific file, spooled to the printer or displayed directly on the screen. Upon selecting one of the five execute modes, the menu is automatically exited and the description of the execute mode is put into this field.
To set the default name for the output file, enter the file name into
the File for output field.
8.8.2.3 Set submit parameters
To set the submit parameters for the reports, select Set submit parameters from the Control Settings menu. The figure shown below appears on the screen.
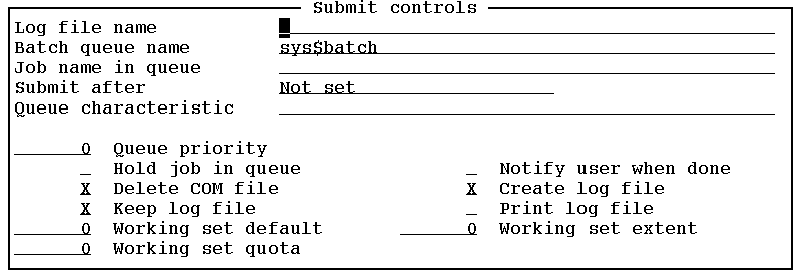
All of the data set in this form only relates to generating a batch job to produce a report. This data does not affect the MEDIA database. For the description of the data to be entered into this form, see the following table. These fields perform the following functions:
Working set parameters: The three working set entries shown on the form provide for limitations on the batch job use of system resources. Each of the values must be within the range specified by SYSGEN parameters, i.e., PQL_MWS* < paramter < WSMAX.
For each of the parameters:
These parameters should not be of consequence to general usage of the Report software but are provided here for completeness. For additional information on these parameters, see VMS System Management, Volume 1A. |
| Previous | Next | Contents | Index |