| Previous | Contents | Index |
In order to use BCKMGR in MCL, select Backup Job Functions from the MEDIA Librarian menu. The Backup manager menu will appear.
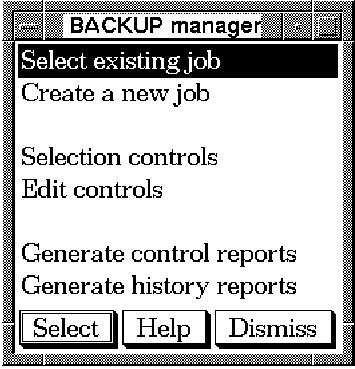
Using the Backup manager menu, the user can first define jobs and then
submit them. All aspects of the job can be designated including the
media to be assigned, the DCL commands executed by the job and a list
of parameters that may be used by the job. The steps involved in
creating, modifying, displaying, submitting and deleting jobs follow.
8.3 BCKMGR field data
The following tables list the fields and descriptions of the forms
encountered in BCKMGR. Refer to these tables when reading
through the chapter if information is needed on a field. Fields are
listed in the same order as they appear on the actual form.
8.3.1 BACKUP job settings
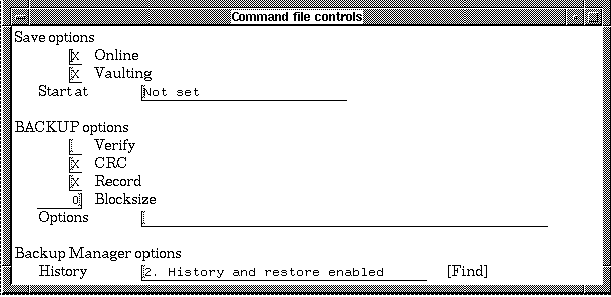
The following table lists all the fields displayed when a user chooses to either modify or display a backup job and then chooses BACKUP job settings from the subsequent menu:
| Field | Description |
|---|---|
| Online | When this option is set, additional information about each file added to the VAULT database is obtained from the on-line copy of the file. |
| Vaulting | Specifies whether or not to add to the VAULT database. |
| Start at | Specifies the timing of the VAULT operation in relation to the backup job in order to delay I/O intensive processes from from running concurrently. |
| Verify | The Verify qualifier toggles the VMS verify operation. If on, it directs BACKUP to perform the job and then compare the results. |
| CRC | Toggles CRC data recording. |
| Record | Toggles the recording of date and time in the BACKUP date field of each file header. |
| Blocksize | Specifies the output block size in bytes for data records in a backup save set. |
| Options | Field to designate any VMS BACKUP utility options required. |
| History |
Choose between three methods of saving the history of backup:
|
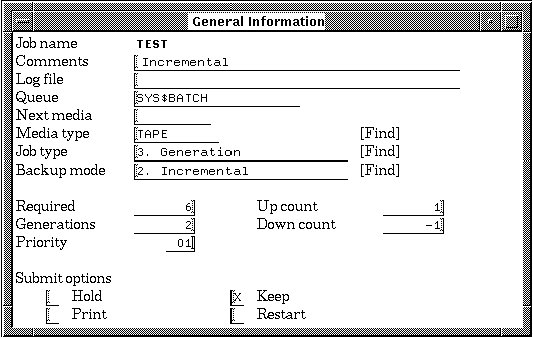
The following table lists all fields displayed when a user chooses to either modify or display a backup job and then chooses General information from the subsequent menu or chooses Create a new job from the Backup Manager menu:
| Field | Description |
|---|---|
| Job name | The name of the job, which, together with the directory, is the unique identifier for this job within the control file. |
| Comments | A text field into which any text data can be inserted. |
| Log File | The location and name of the job's log file. |
| Queue | This defines which batch queue the job is to be placed in for execution. This can either be a generic or node specific execution queue. The default if none has been defined either implicitly or explicity is SYS$BATCH. |
| Next media | The next media to be used when performing a cyclic backup. |
| Media type | Media type as assigned by MEDIA. |
| Job type |
One of four job types chosen from the following list:
|
| Backup Mode |
One of the eight backup modes from the following list:
|
| Required | The number of media required for the job. |
| Generations | The number of generations a backup should exist. The earliest generation is removed from the pool each time a backup job is completed. |
| Priority | This specifies what queue priority to assign this job when it is inserted into the batch queue for execution. The priority is NOT the execution priority but strictly the the priority used to order jobs in the batch execution queue while they are waiting to start. |
| Up count | This count is incremented each time a job is submitted for execution. |
| Down count | This count is decremented each time a job is submitted for execution. When a value of zero is reached, all automatic job submission is terminated. A value of INFINITE or -1 indicates an unlimited number of runs are allowed. |
| Hold | Place the job in the PENDING state on entering into the batch queue. |
| Print the log file after the job finishes. | |
| Keep | Keep the log file on line after the job finishes. |
| Restart | Indicates whether the job restarts after a system failure. |
The following table lists all the fields displayed when a user chooses to either modify or display a backup job and then chooses Access controls from the subsequent menu:

| Field | Description |
|---|---|
| Job name | The name of the job, which, together with the directory, is the unique identifier for this job within the control file. |
| User name | The UIC of the person who created the backup job. |
| Owner | The user name of the owner of the backup job. |
| Protection | The level of protection of the backup job. Corresponds to the VMS protection scheme. |
In order to perform operations on jobs that have already been defined, choose Select job from the Backup manager menu.

This list can be limited to certain jobs using the Selection controls option from the Backup Manager menu. After choosing one of the jobs, the Function menu will appear. Depending on the type of job chosen, the appearance and capabilities of the Function menu will vary.
If the job is a backup job, the user will be able to Display or Modify information, Delete or Submit a job, perform functions on media and start the auto submit cycle. If the job is not a backup job, the user will be able to perform all of these functions, except those concerning the assignment and deassignment of media. This is because, in most cases, non-backup jobs do not require media to be assigned to them.
Figure 8-1 shows the Function\bold) shows the Function menu for a backup job. Note the presence of the section of functions pertaining to the assignment and deassignment of media (compare to Figure 8-5).
Figure 8-1 Function menu: Backup job
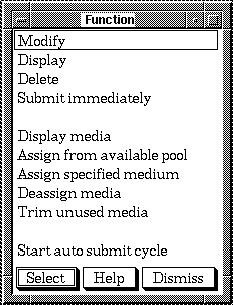
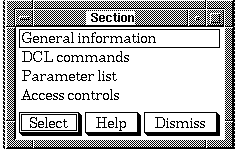
Figure 8-2 shows the Section menu that appears when the user chooses Display or Modify from the Function menu for a VMS backup job.
Figure 8-2 Section menu: VMS Backup job
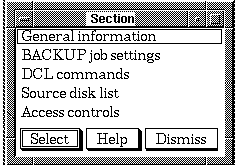
Figure 8-3 shows the Section menu that appears when the user chooses Display or Modify from the Function menu for a RMU backup job (backing up an RDB database).
Figure 8-3 Section menu: RDB Backup job
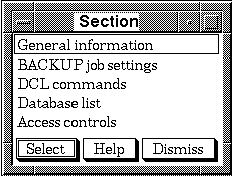 Figure 8-4 shows the Section menu that appears when
the user chooses Display or Modify
from the Function for a mode 1 (Other) or modes 9
through 255.
Figure 8-4 Section menu: Mode 1: (Other)
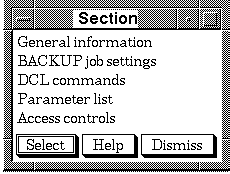
Figure 8-5 shows the Function menu that appears after choosing a non-backup job from the Selection menu. Note the lack of functions related to the assignment and deassignment of media.
Figure 8-5 Function menu: Non-backup job
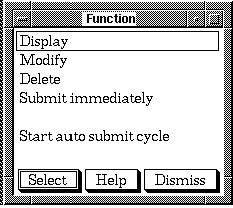
Figure 8-6 shows the Section menu that appears when the user chooses Display or Modify from the Function menu for a non-backup job. Descriptions of each operation for both types of job follow.
Figure 8-6 Section menu: Non-backup job
In order to modify the characteristics of a backup job, select
Modify from the Function menu.
Depending on the type of job, either Figure 8-2 or Figure 8-6
will appear.
8.4.1.1 General information
The general information form describes basic characteristics of the job as well as it's priority and the number of generations required. It also contains the field which designates whether the job is a backup job or not. This effects the nature of the parameter form, determining whether it is a device list or a list of basic job parameters. In order to modify general information about the job, choose General information from the Section menu.
The form shown below will appear. Each field is described on Table 8-3.

The BACKUP job settings are used to configure the type of backup job. In order to modify the BACKUP job settings, select BACKUP job settings from the Section menu.
The form shown below will be displayed for non-RDB backups.

The form shown below will be displayed for RDB backups.

For a description of all fields displayed in the forms, see
Table 8-2.
8.4.1.3 DCL commands
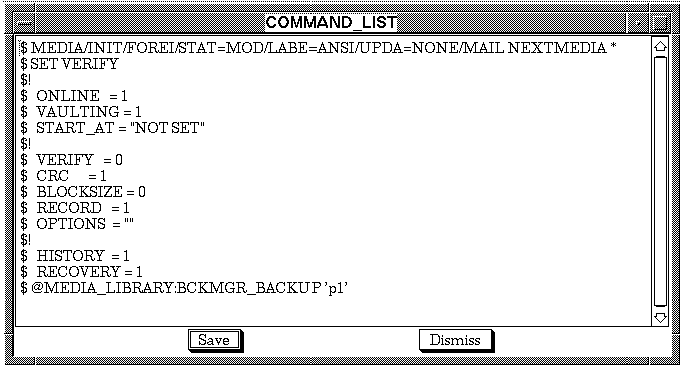
In order to modify the command file of DCL commands for the selected BCKMGR job, select DCL commands from the Section menu. An editor will appear, as shown below.
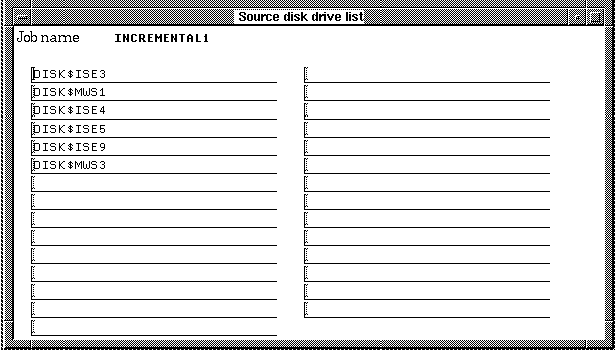
Depending on the job type, this menu item will also vary. If the job is a backup job, this menu item will read Source disk list. In this case, up to 29 source disks to be backed up may be entered in the slots provided. In order to modify the source disks, select Source disk list from the Section menu.
The form shown below will appear.
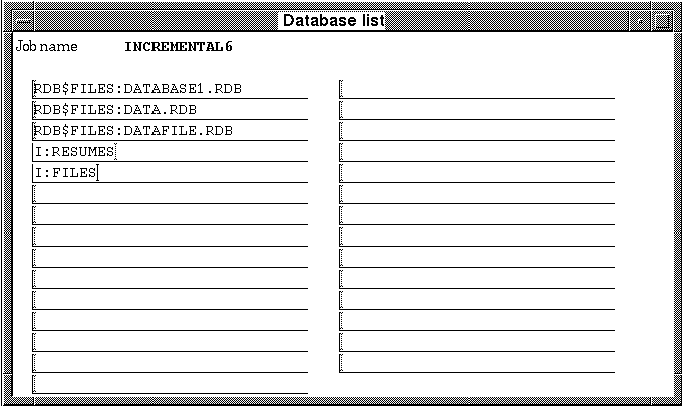
In the case of an RDB backup job, this menu item will read Database list. The database list should include a list of the RDB database files that are to be backed up with the job. This includes the complete path to the data base files. By area operations (portions of databases) can be designated using the following statements adjacent to the database file in the list:
In order to modify a database list for your job, choose Database list from the Section menu. A list similar to the figure below will appear.
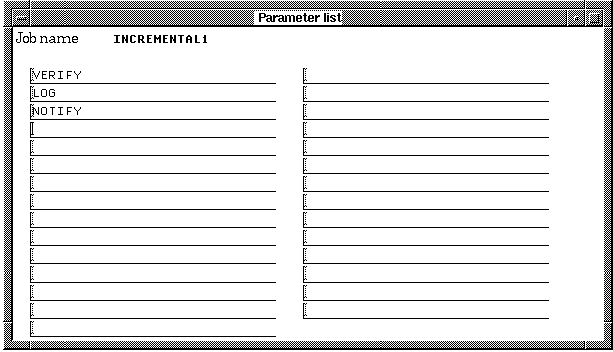
In the case of a mode 1 (Other), modes 9-255 or a non-backup job the menu item will read "Parameter list". The parameter list may consist of any applicable parameters relevant to the job. These parameters should be defined by the user and relate to the commands in the defined job. Parameter 30 is reserved for systems that do not have SCHEDULE 4.0 installed and is used for the rescheduling interval of the job.
In order to modify a parameter list for your job, choose Parameter list from the Section menu. The list shown below will appear.
In order to modify the level of access to the chosen job, choose Access controls from the Section menu. The access controls for the jobs are set using standard VMS protection.
For a description of all fields displayed in the form, see Table 8-4.

In order to display the characteristics of a backup job, select
Display from the Function menu.
Depending on the type of job, either Figure 8-2 or Figure 8-6
will appear.
8.4.2.1 General information
The general information form describes basic characteristics of the job as well as it's priority and the number of generations required. It also contains the field which designates whether the job is a backup job or not. This affects the nature of the parameter form, determining whether it is a device list or a list of basic job parameters.
In order to display general information about the job, choose General information from the Section menu. The form shown below will appear.
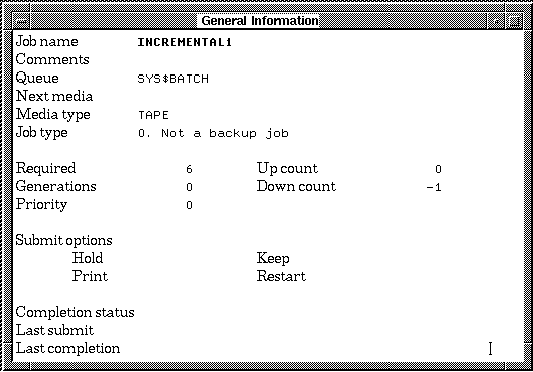
For a description of all fields displayed in the form, see Table 8-3.
In addition to the fields listed in the General information table, two fields are displayed that are not available for modification. These fields are provided purely for status information. They are:
| Previous | Next | Contents | Index |