![]()
![]()
![]()
![]()
|
|
|
|
|
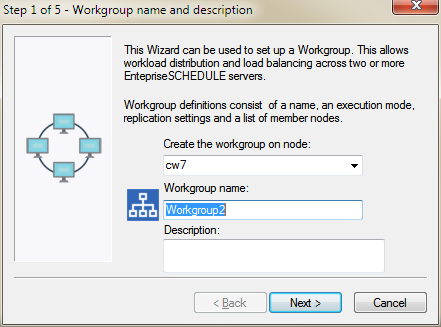
The first step in creating a Workgroup using the Workgroup Wizard is to designate a node name for the Workgroup and give the workgroup a new name. The node name is the location where the Workgroup will initially reside before it is replicated. Any additional workgroup nodes must be accessible to this initial node at all times in order for replication and workgroup processing to take place.
![]()
![]() To designate the initial node, Workgroup name and Description:
To designate the initial node, Workgroup name and Description:
Click on the Next button to go to the step.