Step 2 - Linking the calendar to a job
The second and final step in using a calendar to schedule a job is to associate the calendar created in Step 1 to a job.
- In the folder that the calendar was created, create a new job by right clicking on the folder and selecting New, then Job.
- Rename the new job by right clicking on it, selecting Rename and giving it a name.
- Right click on the job and select Properties.
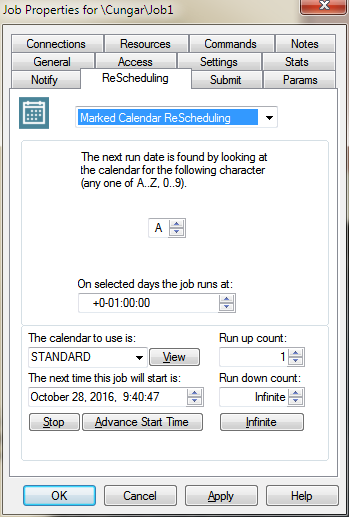
- Click on the ReScheduling tab.
- From the drop-down menu, select Marked Calendar ReScheduling.
- Select the character chosen in selection 7 of Step 1.
- Enter the time of day that the job will run in the time selection field (On selected days the job runs at).
- In the calendar field, choose the calendar created in Step 1.
- Enter the next time the job will run (the first run date) in the "The next time the job will start is" field.
- Enter commands and other applicable properties for the job.
- Click on OK to complete the job.
The job will now run on the designated days as marked.

