Previous Topic

Next Topic

Book Contents

Book Index

Step 1 - Job folder and name

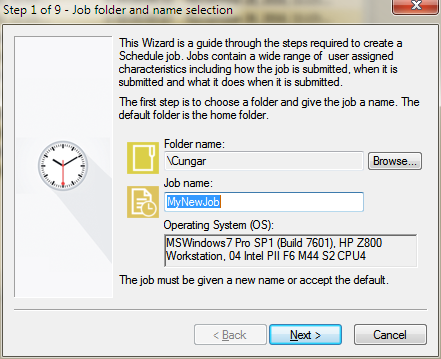
he first step in creating a job using the Job Wizard is to choose a folder for the job and give the job a new name. Keep in mind that this folder and job will exist in the EnterpriseSCHEDULE database and will not be accessible from the Windows Explorer. The folder may be selected from any existing EnterpriseSCHEDULE folders that can be accessed by the user.

To select the folder and name the job:

  1. Click on the Browse… button.
  2. Choose a folder from the EnterpriseSCHEDULE Explorer folder tree.
  3. Enter the name of the job in the Job name field.
  4. Click on the Next button to go to the step.

x

See Also

Using the Job Wizard

Step 2 - Rescheduling mode

Step 3 - Rescheduling parameters

Step 4 - Commands

Step 5 - Submit Attributes

Step 6 - Connections

Step 7 - Resource Requirements

Step 8 - Notifications

Step 9 - Complete the job